Almost everyone who owns a computer has files on their system that they want to keep, that would be irreplaceable if lost. Computer backup can save time and memories.Pictures of little Sammy in the Christmas play, your tax returns for the past five years and video of that trip to the Bahamas can all be gone in the blink of an eye should your hard drive fail.It's highly unlikely that Sam is going to want to dress up as a Christmas tree at 20 years old just so you can recreate lost images.If you have not backed up your files you have to ask yourself the question, "What would I do if my computer suffered a hard drive crash?"Running a computer backup on a regular basis can negate any worries or at least cut damage to a minimum.There are various ways to save your data to a safe location. They can range from the simple, burn files to a DVD, to the more advanced; setting up your computer backup using a utility that regularly backs up the files you specify. This last method is known as a live backup.If you do not backup more than two or three times a year you have to ask yourself if the information that could be lost in the interim is discardable.In the spirit of this website I try to show you the cheaper (blank disks are not free) or free ways to get things done. You can use any of these methods to achieve a computer backup. I do include one way to save your information using third party software and for that you will have to pay for the software. Whichever method you use is up to you, each one depends on how much effort you want to put into it.
Computer backup with CD or DVDComputers these days come with a CD or DVD writer already installed. These computers also come bundled with some kind of software preinstalled to work with the writeable drive. This is perhaps the most common form of computer backup.1. Place a blank disk into the drive This should prompt the computer to open a window giving you the option to make a CD/DVD using the software that came installed with the drive. 2. You can then use the software's window to drag files and folders into the software that you want to save. 3. Click burn to begin the saving process.4. Take the CD/DVD out of the computer drive when completed. Using a soft marker write "back up" and the date on the disk, store this in a safe location. As an alternative you can also move all the files into a folder of their own. Click "Save As" on your document and navigate down to the CD/DVD drive. Choose "Write these files to CD/DVD" and provide a name for your CD. Click "Next" to start saving. Make sure that you use a writeable CD or DVD.
Flash drivesThese devices come in various storage sizes and can be many gigabytes in size. You can connect it to your computer through any available USB port.1. Open "My Computer" with the flash drive plugged into the USB socket.2. The new drive icon will be listed under "Devices with removable storage".3. Double click the icon to open the drive.4. Drag files and folders to the drive window to add them to the flash drive. Computer back up in this method can be used to make a backup portable as well.*Note* Most flash drives have an eject icon. By pulling the flash drive out before you are told that you can safely remove hardware may cause the data on the drive to become corrupted.Online Storage Computer backupMany people are turning to using a third party to save all their important files. You can find a lot of small businesses that use this option, they are often free and offer more storage than a regular computer user could hope to fill. Depending on your computer backup needs and if they exceed the usage of the average user you can upgrade a free account to something more substantial.If this is the path that you choose then go online and research different online computer backup services. You can sign up for a free account and the provider will furnish instructions for saving your files.
NTBackupXP has its own backup utility known as NTBackup. It may look involved the first time you look at it but once you've set it up and used it once or twice you will find it easy enough to use. Also NTBackup can be scheduled to run automatically and you can specify the type of computer backup you want.NTBackup by default is not installed XP Home Edition. To install it:1. Place your XP disc into the CD/DVD drive tray. 2. Close the Windows installation screen that opens.3. Open My Computer 4. Right-click on the drive containing the XP CD and choose Explore 5. Open the VALUEADD folder then MSFT and next NTBACKUP 6. Double-click on the NTBACKUP.msi file and install it. This is the part where most people are sitting there scratching their heads and saying, "I don't know where the disk is" or" My computer didn't come with a disk, what can I do now?"Well most computers these days don't come with a Microsoft disk. The computer's manufacturer sets up a recovery partition to make things easier for the user. While this can be true in most cases, when you do find that you need a disk it can be quite frustrating.Well, Microsoft can help you out here. Follow this link to their site to download NT Computer Backup for yourself.Microsoft NTBackupInstall the software and then you will be ready to begin making your first data backup.1. Go to Start > Programs > Accessories > System Tools > Backup.Use the "Wizard mode". This will help to walk you through the process.2. Click next.3. Since this is the first time that you will be using the software you will be creating a backup, click Next.What you back up is all your own choice. Whether it's your documents, your picture folder or maybe you have a lot of music that you are trying to save.4. Click Next.5. Place check marks in the boxes next to the data that you want save.6. Click Next.7. Choose where to save the file. It can be on your computer or on another computer on you network. You cannot burn the backup directly from NTbackup but you can restore from a CD. Save the computer backup file to your computer and burn to a CD with your CD burning program.8. If you have another drive on your computer you can choose to save it here. Pick a name for it and then click Next.With more people having external hard drives this can be a great location to save your backups.
Computer Backup options For home users a normal backup should be sufficient. Here are the types of backup options.Copy backupA copy backup copies all selected files. Copying is used to back up files between normal and incremental backups because it does not affect other backup operations.Daily backupA daily backup copies all selected files that have been modified the day the daily backup is performed. Differential backupDifferential backup copies files created or changed since the last normal or incremental backup. If you are performing a system of normal and differential backups, restoring files and folders requires that you have the last normal as well as the last differential backup.Incremental backupAn incremental backup backs up only those files created or changed since the last normal or incremental backup. If you use a system of normal and incremental backups, you will need to have the last normal backup set as well as all incremental backups in order to restore your data.Normal backupNormal backup copies all selected files and marks each file as having been backed up. You need only the most recent copy of the backup file to restore the files. A normal backup is created the first time you run a computer backup set.9. After you choose. Click Next.Note - Always pick the option to verify data after computer backup.10. Click Next.11. Choose to append or replace backups. Click Next.12. Here you can schedule your backup for a later time. If not choose Now and click Next.13. Click Next.You're done! At this point you have successfully backed up the files that you have specified.Now you want to restore the computer backup information that you've saved 1. Open NTbackup. Go to Start > Programs > Accessories > system Tools > Backup.2. Choose Restore files and settings, Click Next.3. It's up to you to decide what you want to restore. You may only need to restore certain folders. Place check marks by the files or folders that you are want and Click next4. The next screen will display the restore information based on your choices. Click Next.5. When completed you will receive a restore progress window. Click Close.Depending on what you are restoring you may or may not have to restart windows. Was that so hard?Lastly we come to imaging software Remember I said there was one method you could use for computer backup that would cost you money. This is it. Imaging software takes a snapshot of your PC the way it is right now. Imagine that you take an "image" of your system today. Your computer is set up just the way you like it with all your programs loaded that you use, your favorite desktop wallpaper and all your personal settings. Now what would happen if your hard drive crashed tomorrow? You need to get a new hard drive and reinstall all of your software, change the settings to get it back to where you had it before and find that picture on the internet that you used as desktop wallpaper. 1. Purchase and install some kind of Ghost Imaging Software. In this example I'm going to use Norton Ghost Imaging Software. You will want to research different kinds of imaging software to matchwhat you want in a program and the price youdesire.2. Start the Ghost Imaging program and selectthe "Ghost Advanced" from the Norton Ghost, side menu. Choose the "Clone" option and select the "Next" button.3. Choose the source drive that you desire tocopy on the left side of the Norton GhostMenu. For most home computers, this will beyour "C" drive. You can select more than onedrive if your computer has multiple partitions(i.e., a C and a D drive).4. Choose the drive to copy the ghost image toon the right side of the menu. This can be another hard drive or writable disc such as aDVD-R/RW. Click the "Next" button and then the"Run now" menu choice. After the ghost image iscreated, your computer will reboot normally and Click Image to Enlargethe imaging will be complete.It usually is best to restore a backed up image on a clean installation of Windows. Imaging a drive is often a quicker way to bring your computer and data back to the state of when the image was taken. You will save time not having to reinstall all your programs, windows updates, etc. Always read the manufacturers documentation before using their software.Whichever method you choose you know that your information, files, pictures or music will be safe by choosing to run a computer backup.
Computer Backup by PC Apprentice 2009 - 2017 “I think there’s a world market for about 5 computers.” - Thomas J. Watson, Chairman of the Board, IBM, circa 1948Creating a Computer Backup


 *Note* Most flash drives have an eject icon. By pulling the flash drive out
before you are told that you can safely remove hardware may cause the
data on the drive to become corrupted.
Online Storage Computer backup
Many people are turning to using a third party to save all their important files. You can find a lot of small businesses that
use this option, they are often free and offer more storage than a regular computer user could hope to fill. Depending on
your computer backup needs and if they exceed the usage of the average user you can upgrade a free account to
something more substantial.
If this is the path that you choose then go online and research different online computer backup services. You can sign
up for a free account and the provider will furnish instructions for saving your files.
NTBackup
XP has its own backup utility known as NTBackup. It may look involved the first time you look at it but once you've set it
up and used it once or twice you will find it easy enough to use. Also NTBackup can be scheduled to run automatically
and you can specify the type of computer backup you want.
NTBackup by default is not installed XP Home Edition.
To install it:
1. Place your XP disc into the CD/DVD drive tray.
2. Close the Windows installation screen that opens.
3. Open My Computer
4. Right-click on the drive containing the XP CD and choose Explore
5. Open the VALUEADD folder then MSFT and next NTBACKUP
6. Double-click on the NTBACKUP.msi file and install it.
This is the part where most people are sitting there scratching their heads and saying, "I don't know where the disk is"
or" My computer didn't come with a disk, what can I do now?"
Well most computers these days don't come with a Microsoft disk. The computer's manufacturer sets up a recovery
partition to make things easier for the user. While this can be true in most cases, when you do find that you need a disk
it can be quite frustrating.
Well, Microsoft can help you out here. Follow this link to their site to download NT Computer Backup for yourself.
Microsoft NTBackup
Install the software and then you will be ready to begin making your first data backup.
1. Go to Start > Programs > Accessories > System Tools > Backup.
Use the "Wizard mode". This will help to walk you through the process.
2. Click next.
3. Since this is the first time that you will be using the software you will be creating a backup, click Next.
What you back up is all your own choice. Whether it's your documents, your picture folder or maybe you
have a lot of music that you are trying to save.
4. Click Next.
5. Place check marks in the boxes next to the data that you want save.
6. Click Next.
7. Choose where to save the file.
It can be on your computer or on another computer on you network. You cannot burn the backup directly
from NTbackup but you can restore from a CD. Save the computer backup file to your computer and burn
to a CD with your CD burning program.
8. If you have another drive on your computer you can choose to save it
here. Pick a name for it and then click Next.
With more people having external hard drives this can be a great location to save your backups.
Computer Backup options
For home users a normal backup should be sufficient. Here are the types of backup options.
Copy backup
A copy backup copies all selected files. Copying is used to back up files between normal and incremental backups because it
does not affect other backup operations.
Daily backup
A daily backup copies all selected files that have been modified the day the daily backup is performed.
Differential backup
Differential backup copies files created or changed since the last normal or incremental backup. If you are performing a system
of normal and differential backups, restoring files and folders requires that you have the last normal as well as the last differential
backup.
Incremental backup
An incremental backup backs up only those files created or changed since the last normal or incremental backup. If you use
a system of normal and incremental backups, you will need to have the last normal backup set as well as all incremental
backups in order to restore your data.
Normal backup
Normal backup copies all selected files and marks each file as having been backed up. You need only the most recent copy
of the backup file to restore the files. A normal backup is created the first time you run a computer backup set.
9. After you choose. Click Next.
Note - Always pick the option to verify data after computer backup.
10. Click Next.
11. Choose to append or replace backups. Click Next.
12. Here you can schedule your backup for a later time. If not choose Now and click Next.
13. Click Next.
You're done! At this point you have successfully backed up the files that you have specified.
Now you want to restore the computer backup information that you've saved
1. Open NTbackup.
Go to Start > Programs > Accessories > system Tools > Backup.
2. Choose Restore files and settings, Click Next.
3. It's up to you to decide what you want to restore. You may only need to restore certain folders. Place check marks by the
files or folders that you are want and Click next
4. The next screen will display the restore information based on your choices. Click Next.
5. When completed you will receive a restore progress window. Click Close.
Depending on what you are restoring you may or may not have to restart windows.
Was that so hard?
Lastly we come to imaging software
Remember I said there was one method you could use for computer backup that would cost you money. This is it.
Imaging software takes a snapshot of your PC the way it is right now. Imagine that you take an "image" of your system
today. Your computer is set up just the way you like it with all your programs loaded that you use, your favorite desktop
wallpaper and all your personal settings.
Now what would happen if your hard drive crashed tomorrow? You need to get a new hard drive and reinstall all of your
software, change the settings to get it back to where you had it before and find that picture on the internet that you used as
desktop wallpaper.
1. Purchase and install some kind of Ghost Imaging Software.
In this example I'm going to use Norton Ghost
Imaging Software. You will want to research
different kinds of imaging software to match
what you want in a program and the price you
desire.
2. Start the Ghost Imaging program and select
the "Ghost Advanced" from the Norton Ghost,
side menu. Choose the "Clone" option and
select the "Next" button.
3. Choose the source drive that you desire to
copy on the left side of the Norton Ghost
Menu. For most home computers, this will be
your "C" drive. You can select more than one
drive if your computer has multiple partitions
(i.e., a C and a D drive).
4. Choose the drive to copy the ghost image to
on the right side of the menu. This can be
another hard drive or writable disc such as a
DVD-R/RW. Click the "Next" button and then the
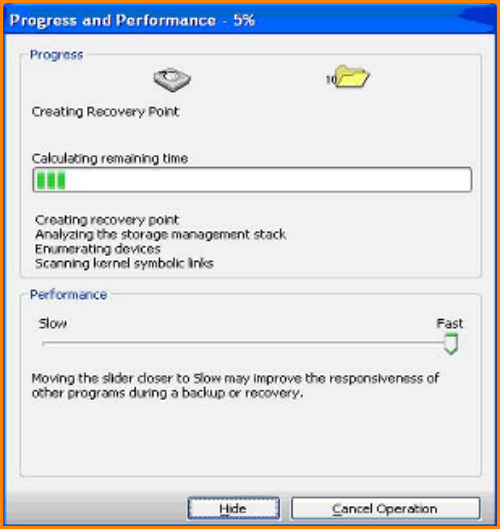
"Run now" menu choice. After the ghost image is
created, your computer will reboot normally and Click Image to Enlarge
the imaging will be complete.
It usually is best to restore a backed up image on a clean installation of Windows. Imaging a drive is often a quicker way to
bring your computer and data back to the state of when the image was taken. You will save time not having to reinstall all
your programs, windows updates, etc. Always read the manufacturers documentation before using their software.
Whichever method you choose you know that your information, files, pictures or music will be safe by choosing to run a
computer backup.
*Note* Most flash drives have an eject icon. By pulling the flash drive out
before you are told that you can safely remove hardware may cause the
data on the drive to become corrupted.
Online Storage Computer backup
Many people are turning to using a third party to save all their important files. You can find a lot of small businesses that
use this option, they are often free and offer more storage than a regular computer user could hope to fill. Depending on
your computer backup needs and if they exceed the usage of the average user you can upgrade a free account to
something more substantial.
If this is the path that you choose then go online and research different online computer backup services. You can sign
up for a free account and the provider will furnish instructions for saving your files.
NTBackup
XP has its own backup utility known as NTBackup. It may look involved the first time you look at it but once you've set it
up and used it once or twice you will find it easy enough to use. Also NTBackup can be scheduled to run automatically
and you can specify the type of computer backup you want.
NTBackup by default is not installed XP Home Edition.
To install it:
1. Place your XP disc into the CD/DVD drive tray.
2. Close the Windows installation screen that opens.
3. Open My Computer
4. Right-click on the drive containing the XP CD and choose Explore
5. Open the VALUEADD folder then MSFT and next NTBACKUP
6. Double-click on the NTBACKUP.msi file and install it.
This is the part where most people are sitting there scratching their heads and saying, "I don't know where the disk is"
or" My computer didn't come with a disk, what can I do now?"
Well most computers these days don't come with a Microsoft disk. The computer's manufacturer sets up a recovery
partition to make things easier for the user. While this can be true in most cases, when you do find that you need a disk
it can be quite frustrating.
Well, Microsoft can help you out here. Follow this link to their site to download NT Computer Backup for yourself.
Microsoft NTBackup
Install the software and then you will be ready to begin making your first data backup.
1. Go to Start > Programs > Accessories > System Tools > Backup.
Use the "Wizard mode". This will help to walk you through the process.
2. Click next.
3. Since this is the first time that you will be using the software you will be creating a backup, click Next.
What you back up is all your own choice. Whether it's your documents, your picture folder or maybe you
have a lot of music that you are trying to save.
4. Click Next.
5. Place check marks in the boxes next to the data that you want save.
6. Click Next.
7. Choose where to save the file.
It can be on your computer or on another computer on you network. You cannot burn the backup directly
from NTbackup but you can restore from a CD. Save the computer backup file to your computer and burn
to a CD with your CD burning program.
8. If you have another drive on your computer you can choose to save it
here. Pick a name for it and then click Next.
With more people having external hard drives this can be a great location to save your backups.
Computer Backup options
For home users a normal backup should be sufficient. Here are the types of backup options.
Copy backup
A copy backup copies all selected files. Copying is used to back up files between normal and incremental backups because it
does not affect other backup operations.
Daily backup
A daily backup copies all selected files that have been modified the day the daily backup is performed.
Differential backup
Differential backup copies files created or changed since the last normal or incremental backup. If you are performing a system
of normal and differential backups, restoring files and folders requires that you have the last normal as well as the last differential
backup.
Incremental backup
An incremental backup backs up only those files created or changed since the last normal or incremental backup. If you use
a system of normal and incremental backups, you will need to have the last normal backup set as well as all incremental
backups in order to restore your data.
Normal backup
Normal backup copies all selected files and marks each file as having been backed up. You need only the most recent copy
of the backup file to restore the files. A normal backup is created the first time you run a computer backup set.
9. After you choose. Click Next.
Note - Always pick the option to verify data after computer backup.
10. Click Next.
11. Choose to append or replace backups. Click Next.
12. Here you can schedule your backup for a later time. If not choose Now and click Next.
13. Click Next.
You're done! At this point you have successfully backed up the files that you have specified.
Now you want to restore the computer backup information that you've saved
1. Open NTbackup.
Go to Start > Programs > Accessories > system Tools > Backup.
2. Choose Restore files and settings, Click Next.
3. It's up to you to decide what you want to restore. You may only need to restore certain folders. Place check marks by the
files or folders that you are want and Click next
4. The next screen will display the restore information based on your choices. Click Next.
5. When completed you will receive a restore progress window. Click Close.
Depending on what you are restoring you may or may not have to restart windows.
Was that so hard?
Lastly we come to imaging software
Remember I said there was one method you could use for computer backup that would cost you money. This is it.
Imaging software takes a snapshot of your PC the way it is right now. Imagine that you take an "image" of your system
today. Your computer is set up just the way you like it with all your programs loaded that you use, your favorite desktop
wallpaper and all your personal settings.
Now what would happen if your hard drive crashed tomorrow? You need to get a new hard drive and reinstall all of your
software, change the settings to get it back to where you had it before and find that picture on the internet that you used as
desktop wallpaper.
1. Purchase and install some kind of Ghost Imaging Software.
In this example I'm going to use Norton Ghost
Imaging Software. You will want to research
different kinds of imaging software to match
what you want in a program and the price you
desire.
2. Start the Ghost Imaging program and select
the "Ghost Advanced" from the Norton Ghost,
side menu. Choose the "Clone" option and
select the "Next" button.
3. Choose the source drive that you desire to
copy on the left side of the Norton Ghost
Menu. For most home computers, this will be
your "C" drive. You can select more than one
drive if your computer has multiple partitions
(i.e., a C and a D drive).
4. Choose the drive to copy the ghost image to
on the right side of the menu. This can be
another hard drive or writable disc such as a
DVD-R/RW. Click the "Next" button and then the
"Run now" menu choice. After the ghost image is
created, your computer will reboot normally and Click Image to Enlarge
the imaging will be complete.
It usually is best to restore a backed up image on a clean installation of Windows. Imaging a drive is often a quicker way to
bring your computer and data back to the state of when the image was taken. You will save time not having to reinstall all
your programs, windows updates, etc. Always read the manufacturers documentation before using their software.
Whichever method you choose you know that your information, files, pictures or music will be safe by choosing to run a
computer backup.
 Computer Backup by PC Apprentice 2009 - 2017
 “I think there’s a world market for about 5
computers.” - Thomas J. Watson,
Chairman of the Board, IBM, circa 1948
“I think there’s a world market for about 5
computers.” - Thomas J. Watson,
Chairman of the Board, IBM, circa 1948
 Creating a Computer Backup